
Architecture 101
I wanted to make a quick post about the architecture I used for the blog, it’s nothing fancy at all but I think it could be useful.
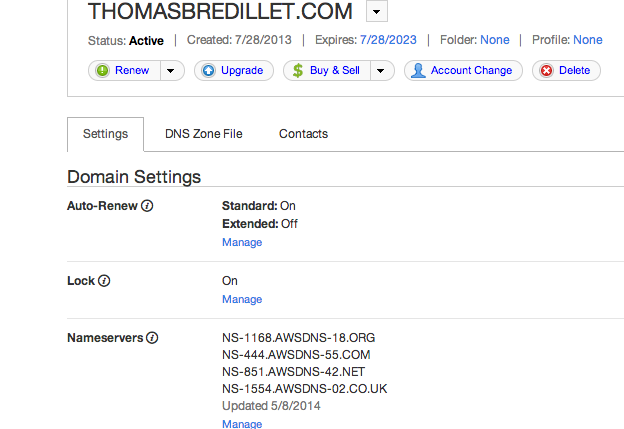
Step 1 : GoDaddy
If you want a custom domain name ( like thomasbredillet.com ) then you’ll have to pay for it somewhere. I chose godaddy because it’s cheap and I’ve used it before. It’s also very easy to use AWS Route 53 nameservers instead of GoDaddys’ nameservers. And if you’re not convinced you can check out what they think on HN I simply bought the domain and when I was done setting up AWS Route 53 I went in the console and replaced the nameservers with the ones from Route 53 :-)
Step 2 : Amazon Web Service - Route53
Now that we need to create the record for our blog in Route 53, just create the new hosted zone using the domain name you have. Once that’s done you’ll have access to those nameservers you need to feed into godaddy ( or your favorite registar ) right here :
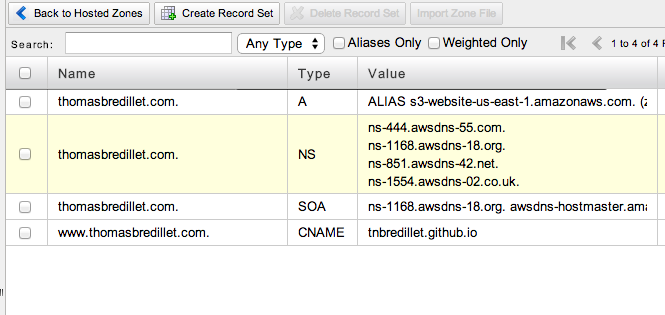
Great! Now when someone goes to thomasbredillet.com or any subdomain ( like sefishfes.thomasbredillet.com or www.thomasbredillet.com ) it redirects to the route 53 name servers which routes to … nothing ! Don’t worry we’ll take care of that soon.
Step 3 : Amazon Web Service - S3
We’ll use S3 static web hosting for only one reason, do make a redirection from thomasbredillet.com to www.thomasbredillet.com indeed I don’t want people to access my website without www for two main reasons :
- Using a custom domain with Github Pages means that you have to redirect to the github page at some point and you can do that using either an A record (using the IP address) which is terrible ( this IP address can easily change for example ) or you can do it the right way and use a CNAME which is going to send the incoming requests to tnbredillet.github.io for example. You want to use the CNAME because it’s permanent and because you’ll go through Githubs’ CDN which is going to make your site faster.
- For SEO reason, having the same content under thomasbredillet.com/post/1 and www.thomasbredillet.com/post/1 is duplicate content and that will affect your ranking negatively.
Unfortunately there’s no direct way to do that with Route 53 alone ( at the time of this post anyway ) therefore we’ll have to make a quick and dirty hack around the issue using S3 static webhosting. Go to S3, create a new bucket using your domain’s name ( in my case thomasbredillet.com ) then click on the name of this bucket, don’t go inside the bucket stay on the higher level view and on the right panel, in the properties enable the static web hosting.
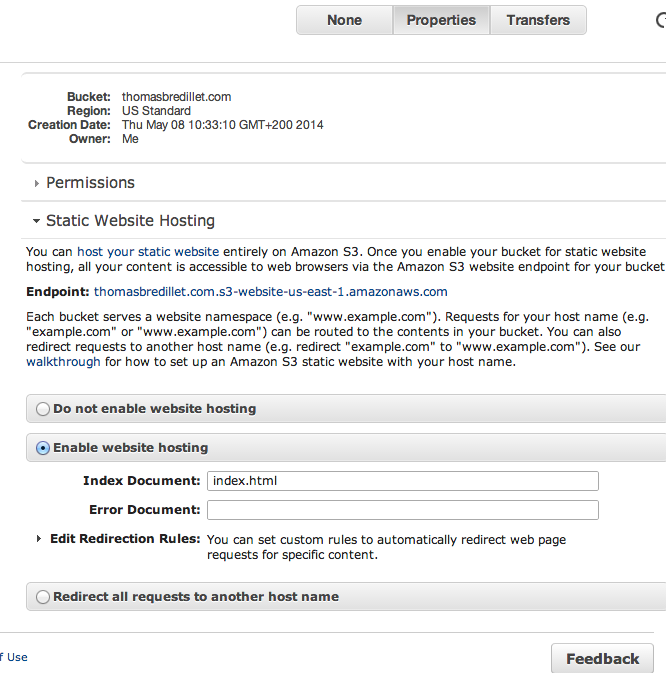
Now that you’ve done that we’ll simply select Redirect all requests to another host name. www.thomasbredillet.com.
Yep that’s not that big, all it does is redirect to your domain with a www.
And we’re done with S3.
Step 4 : Back to Route 53
Let’s go back to route 53 and create the top domain A record that sends yourdomain.com to your S3 bucket ( select it in the dropdown list ).
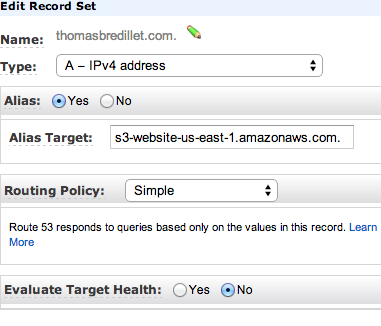
And voila! All requests coming to our domain is going to be sent to the S3 html which is redirecting to www.yourdomain.com which still leads to nowhere.
Step 5 : Jekyll/Github Pages
Finally it’s time to create our blog! Go to your github account ( or create one if you don’t have one - it’s fun ) and create a new repo with yourgithubname.github.io !
On your computer install Jekyll and initiate a new jekyll using jekyll new yourgithubname.github.io
Go in that new directory create a new file called CNAME ( no extension ) with only one line :
www.yourdomain.com
and that is the code of your blog :-) You can push it to your repo!
After a few minutes ( the CNAME takes some time to propagate for me which is understandable ) your site should be up and running on yourdomain.com.
Step 6 : Bootstrap/Customisation/Etc…
Well now everything is there and running all you need to do to update your blog is to write new content and push it on your github repository.
If you don’t like the design Jekyll comes with there are a few ways you could customize your blog :
- Use a theme ( there are plenty of cool jekyll themes ) you can find a list of them here
- DYI. In my case I downloaded JQuery,Twitter Bootstrap, Google Analytics and included Google Fonts and I plan to make something a bit customized with it, I’m no designer ( you could probably tell ) but I think it’s fun to do it anyway :-)